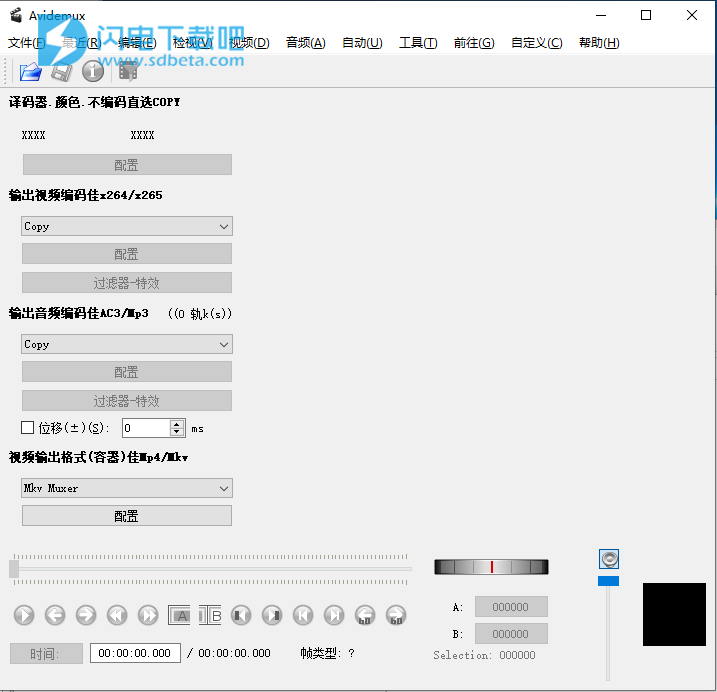
Avidemux中文破解版是一款功能强大的视频编辑器,使用旨在为用户提供各种视频编辑和处理功能,Avidemux允许您以非常直接的方式完成基本的工作。例如你可以进行视频剪切、过滤、编码任务等操作,并且支持的文件类型也是非常的丰富,包括AVI、DVD兼容的MPEG文件、MP4和ASF等,可使用各种编解码器。除此之外,还提供项目、作业队列和强大的脚本功能自动执行任务。本次带来最新中文版ixaz,新版本带来了检测并警告H.264视频流中的切割点可能会导致播放问题,尽管在关键帧上。以及大量的错误修正,有需要的朋友不要错过了!
安装破解教程
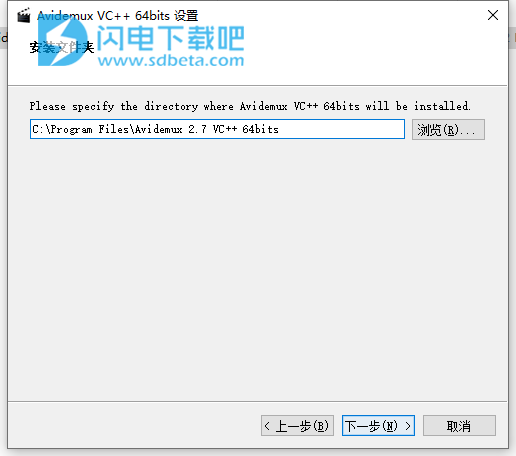
1、在本站下载并解压,双击Avidemux_2.7.4VC++64bits.exe运行,选择路径,点击下一步
2、勾选我接受协议,点击下一步
3、安装完成,退出向导
使用帮助
一、快速开始
Avidemux是一个简单的视频处理任务工具。这里的关键字很简单:它不提供时间轴,多轨编辑等工具,您无法从各种来源自由移动或拼接音频和视频片段。但是,Avidemux允许您以非常直接的方式完成基本的工作。
当您使用主工具栏上的“打开”按钮(Ctrl+O)打开视频文件时,您可以在Avidemux中使用它执行以下三项基本操作:
1、剪切
原因:例如,从电视录制中删除广告,或仅保存您感兴趣的视频的一小部分。
如何:选择带有标记A和标记B按钮的视频部分,然后删除,复制,粘贴或保存该部分。如果您不对视频进行重新编码(即,如果编码器设置为“复制”),请确保所有段都以关键帧开头,否则生成的视频将在切割点处断开。有关详细信息,请参阅“切割”一章
2、编码
原因:您可能希望将视频转换为硬件或软件播放器理解的不同视频格式,或者您只是想将视频压缩到较小的尺寸,以便在Internet上存档或发布。
方法:Avidemux中的编码意味着选择执行视频压缩的编码器。也就是说,左侧的下拉菜单无法设置为复制。有关详细信息,请参阅主窗口一章。
3、过滤
原因:应用于图片的基本过滤器(如逐行扫描或调整大小)可用于各种格式转换。其他过滤器可用于向图片添加字幕,颜色校正等。
如何:过滤器需要重新编码。因此,您必须先选择编码器,然后使用“滤镜”按钮添加滤镜。有关详细信息,请参阅视频过滤器一章。
完成剪切,设置编码器或过滤器后,使用“保存”按钮(Ctrl+S)保存生成的视频文件。
此外,您还可以使用其他一些小功能,例如保存或替换视频中的音轨,连接多个视频文件或保存视频快照。
二、编码或不编码
Avidemux有两种基本模式:复制模式和编码模式。
1、复制模式
当音频或视频编码器设置为复制时,表示不会进行重新编码,并且输入文件中的音频或视频轨道只是按原样复制到生成的文件中。这意味着它非常快(通常最多几分钟),并且没有质量损失。
在以下时间使用复制模式:
您只想从视频中剪切部分,而无需更改输出格式
你想附加几个文件(使用文件→附加或Avidemux提供的自动追加) - 如果所有文件的分辨率(宽度,高度),视频格式,音频格式,音频比特率和采样率相同,你可以使用复制模式
你想修复恒定的音频/视频去同步(使用音频部分中的Shift选项)
您想要执行技术更改,例如将视频保存到其他容器
2、编码模式
选择音频或视频编码器时,将重新编码音频或视频轨道。如果压缩是有损的(大多数编码器都是),这意味着质量损失。编码也比复制慢得多。根据计算机的速度,可能需要数小时才能完成。
在以下时间使用编码模式:
您想要执行音频或视频格式转换
您想将文件压缩到更小的尺寸(以质量为代价)
你必须做精确的切割,这是关键帧无法做到的
你想使用过滤器(没有重新编码就不可能过滤音频或视频)
你想加入几个具有不同属性(不同格式,不同分辨率等)的文件
三、仅保存音频
如果您只想保存文件中的音频,这是一个快速指南。这很简单,但非常有用。
加载视频文件。
可选:如果您只想要一部分音轨,请设置A和B位置。
从侧面板,音频部分,选择您要使用的音频编解码器(ndash),例如MP3,Vorbis,WAV,AAC或复制,如果您只想提取一段原始音轨。
使用“ 配置”按钮配置音频编解码器的选项。
进入菜单:音频→保存。
保存音频文件。
警告提示:使用该方法将保存原始音频轨道。如果它是AAC或Vorbis,您将最终得到一个无法播放的文件,因为它们需要一个可以播放的容器。(Git头可以在ADTS容器中导出AAC)
四、从静止图像和音频文件创建视频
本页面试图解释如何从静止图像和音频文件创建视频文件。然后,您可以将这些文件分享给您的朋友(甚至将其上传到YouTube)。
基本计划非常简单,打开单个图像文件,复制+粘贴几次,添加音频并保存结果(如果需要,编码音频+视频)。不幸的是,某些AVIdemux版本存在帧复制问题,有时可能会导致AVIdemux崩溃。其他问题与MP3音频文件有关,AVIdemux可能会忽略这些文件。
简而言之:
通过文件打开图像文件→打开...
使用编辑→复制,然后使用编辑→粘贴(使用Ctrl + v )复制静止图像
通过音频→主轨道添加音频...
设置视频和音频编码器(如果需要),选择输出格式然后使用文件→保存→保存视频...
1、打开图像
这是最简单的一步。只需使用文件→打开...,然后选择要使用的.png或.jpg文件。 AVIdemux现在应该在编辑器中显示图像。不幸的是,AVIdemux没有打开所有图像文件也没有正确显示它们,如果发生这种情况,则使用一些图像编辑器并更改图像格式(例如.jpg→.png)并再试一次。 您可以稍后调整图像大小/裁剪图像,但在将图像添加到AVIdemux之前,可以更轻松地在图像编辑器工具中调整图像大小/裁剪图像。
2、复制+粘贴
现在需要一些数学的部分。别担心,计算很容易。你必须使用复制+粘贴+粘贴+粘贴...(使用Ctrl + v 进行粘贴,按住它),直到你有足够的帧。在这种情况下,足够的帧意味着以秒为单位的音频长度乘以FPS。默认FPS为25,您可以从视频→帧速率 更改FPS值... 因此,如果您的音轨是3分24秒,而FPS是25,那么您需要(3 * 60 + 24)* 25 = 204 * 25 = 5100帧。你不需要那么多的帧,但是一些视频播放器只会在视频轨道的持续时间内播放视频,所以如果你想要播放整个音频,那么至少要有那么多帧。
您可以使用复制+粘贴,然后将A选择设置为0,将B选择设置为最后一帧,然后复制+粘贴并重复,而不是复制+粘贴+粘贴。 如果你在这个步骤中获得了崩溃,那么尝试AVIsynth方法,或者只是将小的工作部分保存到视频(如40帧),并将它们与文件→附加...一起加入...
3、导入音频文件
您可以将AC3,MP3和WAV音轨导入视频。您可以通过音频→主音轨...添加音频,然后从音频源根据音轨选择外部AC3 / MP3 / WAV,并通过外部文件选择音频文件。 如果您已导入MP3音频但未包含,则尝试使用MP3packer或类似工具处理音频文件(如果您将MP3音频文件转换为WAV,Audacity也可以使用)。
4、设置编码器,并保存文件
现在您的视频已准备好保存。对于许多人来说,选择视频和音频编码器并不容易,因此下面是一些可行的预选选项
视频:MPEG-4 AVC(x264),音频:AAC(Faac),格式:MP4
视频:MPEG-4 ASP(Xvid),音频:MP3(跛脚),格式:AVI
您可以将音频部分保留为复制(带MP3音频文件),这样可以避免不必要的编码步骤,这将节省一些时间并保持音频质量。
(如果您需要通过视频→过滤器或音频→过滤器,可以在此时应用过滤器)
保存视频通过文件→保存→保存视频...(记得提供文件扩展名,例如,如果您选择格式:MP4,然后将.mp4添加到文件名) 文件大小应该非常小,因为静态图像变成视频可以压缩大多数视频编码器非常有效。
更新日志
Avidemux 2.7.8 : Changelog
New Features
Many new video filters added by courtesy of <a href=”https://github.com/szlldm”>szlldm</a>
A dedicated MOV muxer is now available, replacing silent fallback to MOV muxing mode within the MP4 muxer.
A subset of color info relevant for HDR support is retained in copy mode when both input and output video are stored in Matroska / WebM containers. Settings to add or override color info have been added to MKV and WebM muxers.
The indexer in the MPEG-TS demuxer now detects resolution changes in MPEG-2 and H.264 streams which are entirely unsupported and suggests aborting indexing. If the user chooses to continue, it records file offsets of all resolution changes to the log. This allows advanced users to split the file at these offsets using other tools like head and tail into chunks which can be processed with Avidemux.
YUV varieties of the lossless Ut Video codec are supported now for decoding and encoding via bundled FFmpeg libraries.
Uncompressed 24-bit audio is now supported for a subset of file formats.
Limited support for 7.1 channel layout.
Decode and stream copy support for XLL substream in DTS audio tracks.
Audio properties are now updated on resuming playback. This allows to start saving after an audio format change. When audio format changes during playback, the FFmpeg-based audio decoder will output silence and keep format rather than producing garbage.
An option to keep the identity of markers A and B instead of swapping them automatically has been added to Preferences.
The keyboard shortcut for “Delete” action has been made customizable with alternative keyboard shortcuts enabled.
Other Enhancements
Multi-threaded video decoding is now available for the bundled FFmpeg. On powerful multi-core CPUs, this can drastically improve decoding performance. A maximum of 8 threads can be created, but a conservative custom upper limit of 4 is recommended. Values above 8 cause decoding failures. Multi-threaded decoding and HW accelerated decoding are mutually exclusive, changes require application restart to have effect.
The maximum supported resolution has been increased to 8192×8192
The bundled FFmpeg has been updated to the 4.2.4 release.
Non-standard display aspect ratios can be configured in MP4 muxer by specifying display width.
MP4 muxer accepts now MPEG-1 and MPEG-2.
The configuration dialog of the x265 video encoder plugin enjoyed massive cleanup and refactoring by <a href=”https://github.com/xyzzy42″>Trent Piepho </a>, more Adaptive Quatization Variance methods have been added.
Python interface has been substantially extended, includes now methods to query segment properties, the number and filenames of loaded videos, PTS of keyframes, methods to seek to time with preview updated, to open file dialogs filtered by extension and a built-in method to split filename extension from a given path.
Scripting shell now supports unicode characters.
On macOS, files can be loaded via Finder context menu or by dropping them onto Avidemux icon in the dock.
On Linux, Jobs GUI and the CLI executable can be launched from AppImage by creating a symlink with _jobs or _cli in filename respectively and running the AppImage via this symlink.
Bugfixes
Rate control was broken in some video encoders, especially in VP9 and in NVENC-based encoders, fixed now.
Multiple issues in cut point checks for H.264 and HEVC streams in copy mode, leading to incorrect check results, were identified and resolved.
The first two frames of external AC3 or EAC3 audio tracks are not dropped anymore. This regression from enhanced protection against false positives, added 3 years ago, has been finally identified and fixed.
Indexing of MPEG-TS files with HEVC video was broken when video stream lacked access unit delimiters. The issue was identified and fixed right after 2.7.7 had been tagged as released and is the reason why version 2.7.7 was superseded by 2.7.8.
VU meter was grossly ahead of audio output on Windows, now it is just a tiny little bit ahead.
Numerous other fixes and overall polish.